
Throughout my time working on my other projects I was iteratively working on a tile editor that I could use for all my tile based programs. With each project I needed to create my levels in some way and always ended up using text files or images.
The tile editor had three major editions, each about 6 months apart as follows:
Version 1:
Looking back on the first version, I can see many flaws. The most obvious of which was the small size of the window it opened with. At 800×600 and no option to resize, there was very little room to fit all the GUI needed to work on the maps themselves. On top of that, I decided to further constrict the map view to a subsection of the window to make room for the tile selection screen. Quite quickly I realised I needed to take a different approach and so I started working on the next version:
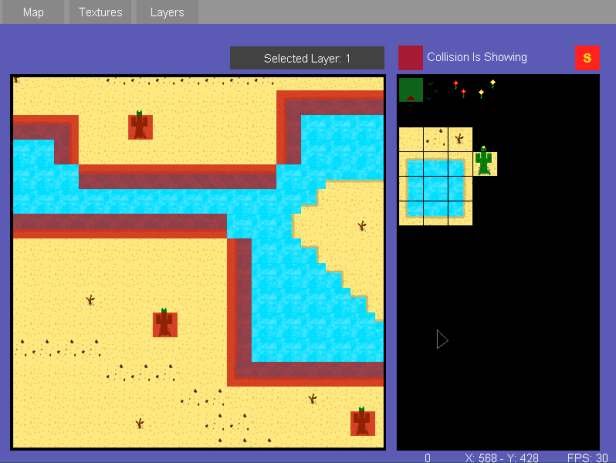
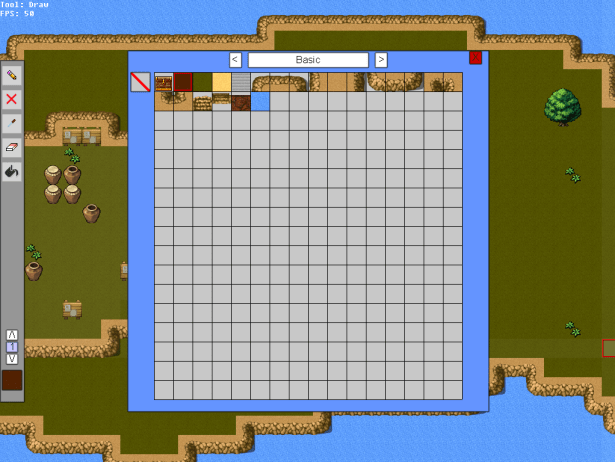
Version 2:

With this next version I set out to use a bigger window size (1024×768) and allow the map to fill as much of the screen as possible. This meant pushing the tile selection off into a ‘Tile select’ popup but the additional screen space was worth the effort. With this new editor I made more use of the layer tools too, allowing for the standard layers for putting objects ontop of the landscape but also the ability to paint light and dark shades onto the tiles, seen subtly on the left of the image on the raised hill.
The addition of animated tiles also was introduced here, allowing for chests and water to be animating while inside the editor.
Version 3:
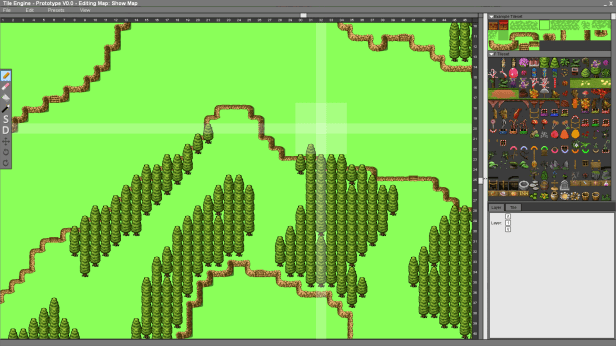
Version 3 upgraded once again from a 1024×768 window to 1920×1080 and included a collapsible side panel with tile group selection and the start of a properties window. By the end of this project I was getting ready to head off to University and as such I had little time on my hands to continue development. Once at University I switched to using more competent languages and left Dark Basic behind.
